The post Chilli Seeds are Hot This Summer appeared first on GrowGoodNZ.
]]>
chillies grown from seeds
The sight of the glorious glowing red fruit makes most people feel happy!!
But they are also another of those vegetables that people either love or loath. Chillies have been cultivated in Latin America since 7500BC. Christopher Columbus’ physician is credited with bringing chilli seeds back from the New World on Columbus’ second journey. The Portuguese then took chilli seeds along their trading routes and within only 50 years they had spread to Africa, Asia and Europe.
Small chillies are hotter and shorter lived than bigger chillies. Sometimes chilli plants will live for two seasons. Last year I kept some of my chilli plants alive through winter and they were ready to start harvesting in December. We live in Wellington so it is out of the question to grow them outdoors as there is not enough summer warmth.
The heat in chillies comes from a compound named capsaicin, most of which is in the chilli seeds and white flesh. Generally the smaller the chilli the more heat. The heat is measured on the Scoville Scale which is a method of comparing the heat of all kinds of chillies. I will write more about it another time.
Chilli seeds growing conditions
Chilli seeds are really easy to grow provided you follow some basic rules. Chillis love hot humid conditions. The more sun the better. The roots like good aeration so the air pocket under the false floor of a GreenSmart pot provides great aeration. They love rich, free draining soil and hate having wet feet. Once established, they are quite tolerant of dry conditions so I find that the plants keep thriving even when the top couple of cm of soil is quite dry. Warmth is essential.
Start the seeds in September or October. They can be slow to get started – it varies from one to six weeks. They need warmth, oxygen and moisture.
Options for chilli seeds. If you try growing chillies from store-bought chillies, there is a possibility of them being hybrid seeds. Better to buy certified seeds or save your own from non hybrid plants. However if you have grown more than one variety of chilli and saved some seeds there is a high risk of them being cross bred ie not true to type.
Moisten the seed raising mix, add the seeds – at a depth of only about 1 mm. It is critical to provide enough warmth – they need to average about 20 deg C over 24 hours. Here in Wellington, I grow them in a tunnel house. You can start them off in a sunny spot inside the house. They don’t need light until after the first leaves emerge. Then shift the GreenSmart pot to somewhere warm and light. If you grow four to six plants they will provide you and your friends with an abundance. Aim to plant seeds in September – October and transplant seedlings in November- December.
Kings Seeds have a selection of about 30 types of chilli seeds. www.kingsseeds.co.nz
Use 50 cm long bamboo stakes to support the plants so they don’t fall over.
The plants will draw very little water as they approach maturity. Don’t worry if the top layer of the soil is very dry.The plant roots will draw the water up at the right rate.
Pests and Diseases
Generally not a problem. If growing in a hot house be sure that they have plenty of air movement to minimise mould problems. Avoid overhead watering. Add water via the water sight glass to keep the top layer of soil dry.
Sapsuckers…Aphids may gather in clumps. Move quickly – a daily quick squirt with high pressure hose for a few days. Or a garlic spray.
Chilli seeds Fertiliser
From flowering, feed them fortnightly with liquid seaweed or comfrey tea directly into the water sight gauge.
Companions
Tomatoes and basil are good friends with chillies. Grow a marigold with your chilli plants as a deterrent to aphids and white fly.
Harvesting
Start picking as soon as the first few are ready – to encourage them to keep fruiting. It is better to harvest when they are mature but before they are fully ripe.
Handling chillies can be a dangerous business. Avoid touching them. Don’t let the juice get under your finger nails.Be careful about touching other sensitive parts of your body. If you do get burned, moisten yours hands with cold water, apply plenty of dish-washing detergent. Scrub for at least five minutes.Better still, use gloves to harvest the hottest ones.
A few years ago when we were holidaying in a rural part of southern China we came across these chillis being dried on the school playing grounds during the summer holiday.
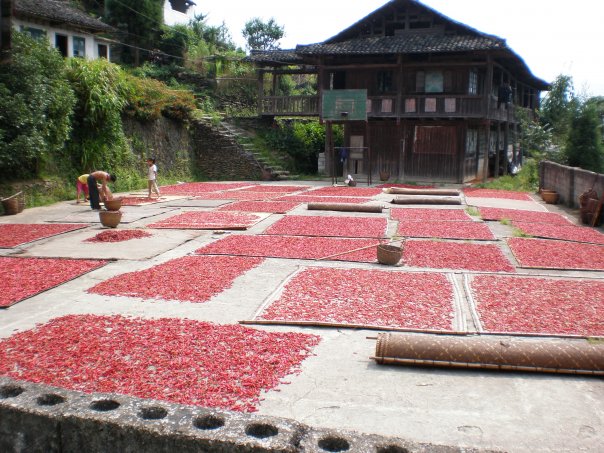
Drying chillis
Photo of drying chillies in Chinese school
Storage
Chillis are easy to dry for storage or you can simply bag and freeze them.
For the real NZ chilliphiles you can register on this forum site: www.chilliforums.co.nz
Happy gardening,
Bill.
The post Chilli Seeds are Hot This Summer appeared first on GrowGoodNZ.
]]>The post Growing lettuces GreenSmart Pots growgoodnz appeared first on GrowGoodNZ.
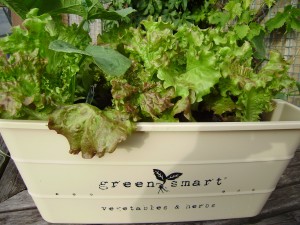
]]>Growing lettuces is the perfect way for a new gardener to start learning how to grow plants. Lettuces are so easy to grow if you are living in an apartment too. I like to see several contrasting lettuces with different colours, shapes and textures growing together in one pot
It is a fantastic feeling to be growing lettuces and to be able to pick lettuce just outside your door by having a GreenSmart Pot close to the kitchen with a ready to use selection of several types lettuces and herbs. They are perfect for inner city apartment living.
There are four types of salad lettuces.
Butterhead lettuce which is a heading variety with a loose arrangement of leaves .eg Boston. Crisphead lettuces which produce large hearts of curled and crisp crunchy leaves. Eg Iceberg type Cos (or Romaine) lettuce which have upright growth and an oblong head. Cos is hard to beat for crunch, colour and hardiness. Simply pick off the outer leaves and more will grow. Loose leaf lettuce – pick a few leaves at a time. They can be grown through most of the year. This is the perfect vegetable for a novice gardener to start with.
Conditions for growing lettuces
Green Smart Pots are particularly suited to lettuces as lettuces love free draining, well aerated soil and hate wet feet The best lettuces grow in spring and autumn but are easily grown all year with good planning.
Lettuce grow best in sunny conditions in cooler times or in partially shaded conditions in summer. They will do best at temperatures between 8 and 24 deg C. They prefer the shade provided by other plants rather than by shade from a structure like a building. Here in Wellington we find that we can grow them right throughout winter in GreenSmart pots. Fast grown lettuce develop the best flavour and crispness. Slow grown plants tend to be bitter.
Once the plants are established it is best to water them via the water sight glass as this avoids splashing water up onto the leaves which encourages bugs and fungi on the plants
Lettuces like non-acidic conditions therefore add dolomite (for short term effect) and lime (for longer term effect). If you are able to check pH – the ideal is 6.2 to 7.0.
If you live in a windy part of the country then pick a site for the pot that will be protected from direct wind while the plants are small.
Growing lettuces fast in GreenSmart pots
Fast grown lettuce develop the best flavour and crispness. Slow grown plants tend to be bitter.
It is best to plant every 3-4 weeks to provide continuous picking. Place the seeds 12 mm below the surface and cover with fine seed raising mix. Cover the pot with the elasticized plastic cover to create a hot house effect. The seedlings will emerge in just a few days in the warmer months and will be ready to eat in 60-65 days. If growing from plants, they will be ready to start picking in 3-4 weeks. I like to plant a few fast growing lettuces in the same pot as tomatoes or cucumbers. This gives good lettuce pickings before the tomatoes/cucumbers are half grown.
Companion Plants
Lettuce like the company of onions, carrots, radishes and strawberries. Avoid planting with parsley and celery.
Cooking with Lettuce
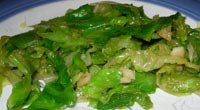
Mostly we think of lettuce as being a raw vegetable but in some cuisines lettuce is cooked. Here is a Chinese recipe: http://chinesefood.about.com/od/vegetablesrecipes/r/fried_lettuce.htm
Check out this Jamie Oliver recipe.
http://www.jamieoliver.com/recipes/vegetables-recipes/braised-peas-with-spring-onions-and-lettuce
Happy gardening,
Bill.
The post Growing lettuces GreenSmart Pots growgoodnz appeared first on GrowGoodNZ.
]]>The post Tomato Plants in GreenSmart Containers appeared first on GrowGoodNZ.
]]>Tomato plants are easy to grow from seed or from plants and because the mature plants need a lot of water, they are ideally suited to GreenSmart self watering planters. These planters can hold up to 12 litres of water in the reservoir…. far more than any other self watering planter on the NZ market.
Labour weekend is the traditional time for planting tomatoes but they are ok to plant right up to Xmas.
This year I am taking a multi-pronged approach and am expecting several months of fresh tomatoes.
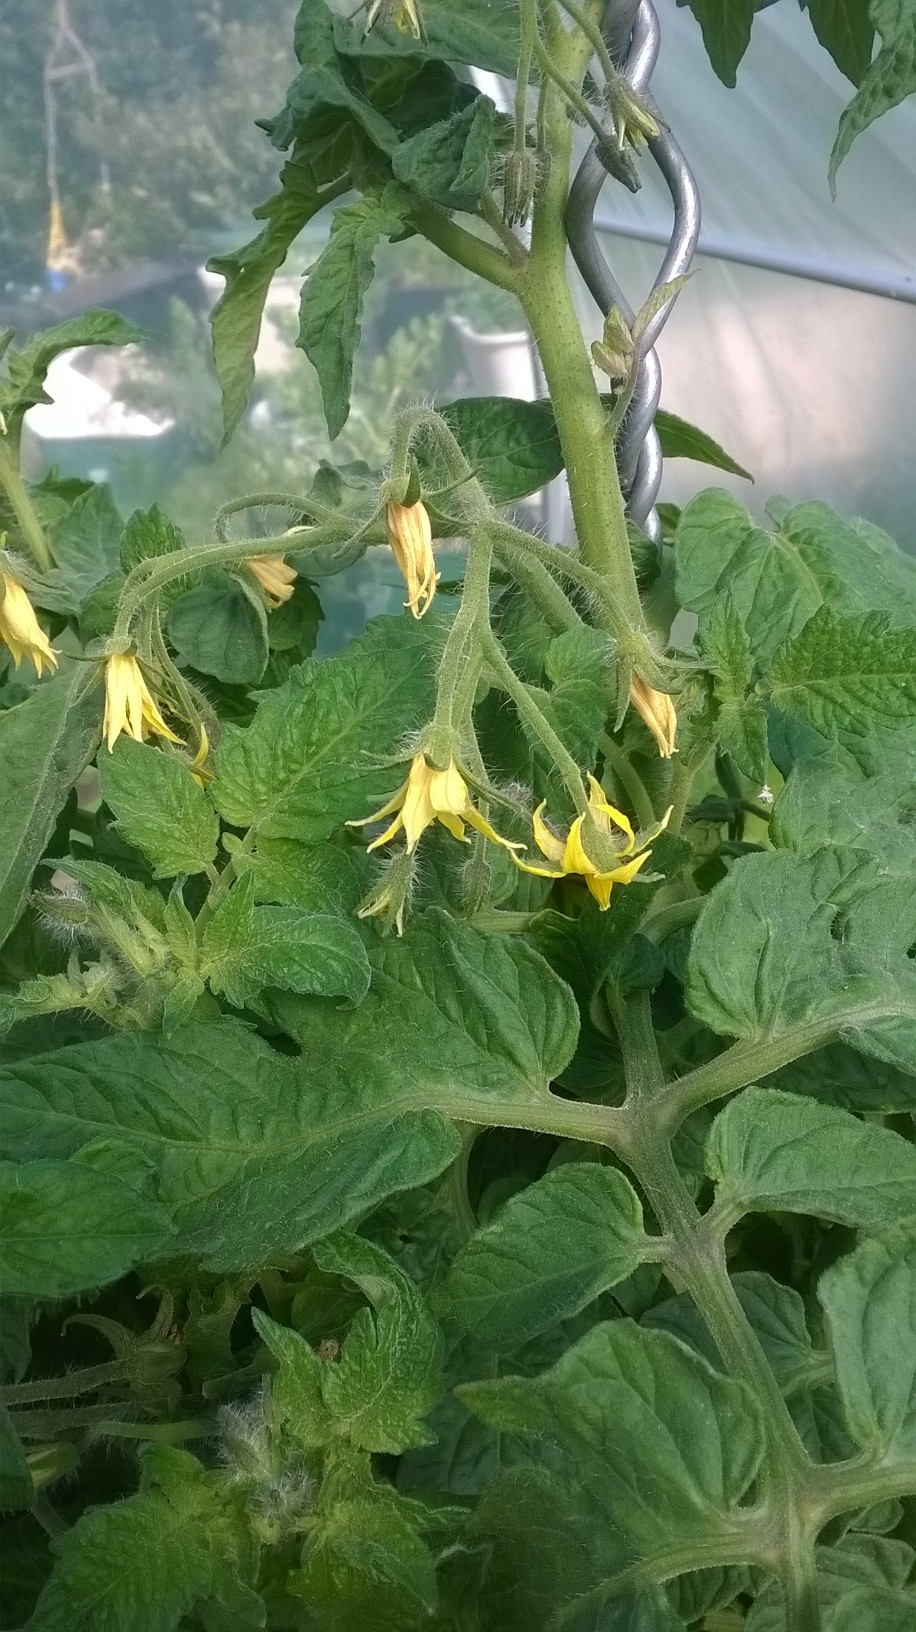
In mid September I bought a grafted dwarf tomato and have allowed most of the suckers to grow. As of late October it is going really well in the tunnel house. It is growing in a small pot with an 8 litres water reservoir. In the same pot I have also got a self-seeded cherry tomato and a few spinach plants. The dwarf tomato plant is just beginning to flower now (late October)
young tomato plant ready to attach to stake
I have also planted three types of heritage tomato seeds – Marmande, Cherokee Purple and Beefsteak. There are a couple of dozen seedlings in one small pot. When they are about 15 cm high I will transplant the strongest ones -some into larger GreenSmart pots and some into our regular garden. I will grow two or three tomatoes in each pot.

Heritage tomato plants in a small GreenSmart planter
Best Growing Conditions for Tomato Plants
When planting seeds, allow a few cm between seeds so the seedlings develop good strong stems.
When transplanting tomatoes it is worth burying them right up to the first leaves to encourage more roots. Alternatively try laying them flat in a shallow trough.
Tomato plants love sunshine – the more the better. Make sure that they are getting lots of warmth and sunlight. They also need good air circulation.
Fertiliser
Tomatoes in pots require plenty of nutrients. Make sure that the pot has got plenty of fertiliser – eg well rotted animal manures, sheep pellets, Yates Dynamic Lifter.
Last year I experimented with adding a couple of tablespoons of milk powder under the roots. I also added liquid milk into the water sight glass. It worked well so I am doing it again this season. The theory is that it adds calcium to the tomato plants. Calcium is a macronutrient.
When flowering commences, every week or two add liquid fertiliser directly into the water sight gauge.

It is better to water through the sight gauge. Let the surface dry out.
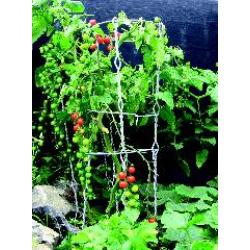
Tomato Stakes
These stakes have unmatched functionality and strength to ensure a lifetime of good use. Built of rugged steel and made in New Zealand.
- No tools required
- No tying required
- Pushes easily into the soil
- Strong, wind proof and will last a lifetime
- The supplied clips support the stem and fruit all the way to the top
- For tomatoes and all climbing plants
- Backed by a 10 year guarantee.
 |
Features and benefits
 |
 |
 |
Pests & Diseases
Remove any wilted or brown leaves as soon as they appear.
Tomato Plants Companions
Try growing basil and marigolds with tomatoes. The smell appears to repel aphids and white fly.
Harvesting
For best flavour pick the tomatoes while they are still warm from the sun and eat immediately!!
Here are a couple of websites about using milk or milk pwder with tomato plants.
http://yougrowgirl.com/tomatoes-like-milk/
http://www.gardeningknowhow.com/garden-how-to/soil-fertilizers/milk-fertilizer.htm
It’s good to grow, Bill.
The post Tomato Plants in GreenSmart Containers appeared first on GrowGoodNZ.
]]>The post Growing beans growing tips appeared first on GrowGoodNZ.
]]>Tall Tales from Jack & the Beanstalk
Growing beans epitomises why I love gardening. At this time of the year I always look forward to being able to pick and eat beans from our garden throughout the summer months. Garden fresh beans are so much tastier than soggy super market beans. There are two types of summer beans to grow in GreenSmart Pots….. Dwarf beans and climbing beans.
Conditions for growing beans
Beans thrive in a warm, sunny spot out of the wind. They are nitrogen-fixers. ie they extract nitrogen from the air and store it on nodules on the roots so making nitrogen available for kick starting the next crop you plant in the same potting mix.
In most parts of New Zealand they can be planted from October to February. Ground temperatures should be above 15 deg C. Be sure to include plenty of good organic fertiliser mixed into the potting mix as the beans are going to need a lot of nutrients.
I prefer growing beans from seeds rather than transplanting plants because they do better without the disruption of transplanting. After preparing a large pot with organic fertilisers, plant 18 to 24 seeds at a depth of three cm or roughly three times the seed diameter. Stretch the elasticized plastic cover over the pot and wait 7 to 10 days until they have emerged into their own little hothouse. After removing the cover, you can enjoy watching the plants take off. In cooler parts of the country it is a good idea to position the GreenSmart Pot in a sunny spot then later shift it to its final position. Be on the lookout for slugs and snails when the seedlings are very young. Don’t let those slimy gastropods have a gastronomic feast at your expense!
Growing beans do best with shade on the roots and plenty of sun on the foliage.
Dwarf Beans
We enjoy these McGregor’s Gourmet Range dwarf beans called Borlotti Red Rooster. The mature beans are a wonderful cream and cranberry colour.
http://www.mcgregors.co.nz/seeds/gourmet-seeds/mcgregors-bean-borlotti-red-rooster

If you make a second sowing of dwarf beans in another six weeks you will have a longer period of continuous picking. Alternatively you can plant half a pot with beans and half with say cucumbers or lettuce or peas.
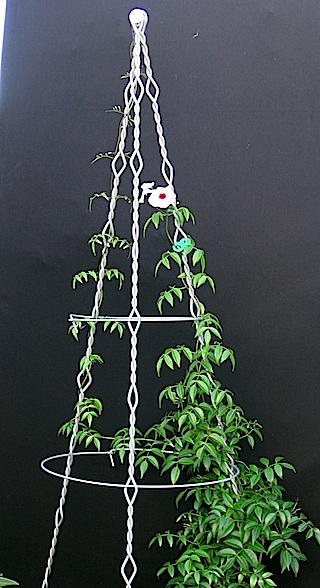
Climbing Beans
Several weeks ago we planted perennial Scarlet Runner climbing beans in the hothouse. Now they are well above my head and we are getting a meal every few days.
Here are some ideas for supporting climbing beans in GreenSmart Pots:
- Check out our amazing selection of very attractive and long life climbing frames at http://TRIPOD OPEN TEE PEE EXTRA LARGE
-

great for growing beans

suitable for tomatoes, beans
- Drive stakes into the ground at the four corners of the pot and use string tied between the stakes as a frame work for the beans to hang onto.
- Use bamboo stakes and build a four legged tee-pee above the pot for the runners to climb up.
- If the beans are on a deck of an apartment, use lengths of twine looped under the pot and tied overhead onto the overhead frame of the deck. Then train the beans up the twine.
- Erect a section of trellis alongside the pot.
Climbing beans produce beans over a longer period than dwarf beans. I nip off the growing tips when the plants reach about two metres high to encourage them to put more energy into producing bean pods rather than climbing higher.
Perennial beans will die back in autumn and then the plants will grow again in spring.
Fertilisers
Liquid fertiliser can be added into the water via the sight glass. I use liquid sea-weed and comfrey tea. The best time is while the plants are flowering. If you are getting a lot of leaf growth but not so many bean pods, it may be due to over fertilising.
Companion Plants
Beans like to be near Carrots, Cucumbers, Cabbages, Corn, Lettuce, Peas, Parsley, Cauliflower, Spinach and Summer Savory. Have you heard about the three sisters? Traditional Native American planting included growing beans, corn and pumpkins together. Try planting a pumpkin in the middle of the pot surrounded by climbing beans and corn. The corn provides a structure for the beans to climb up. The beans fix nitrogen into the soil for the other plants.
Avoid planting beans near onions, garlic, chives.
Harvesting
Dwarf beans and climbing beans will be ready for picking in 8- 12 weeks. Begin picking when the pods are about 10 cm long. Pods are ready if they snap easily when bent. Frequent picking encourages more flowers to continue developing.
Seed Saving
Saving your own bean seeds is easy. Choose a few of the best pods and allow them to fully ripen and dry. The seeds will swell up and the pod will develop a tough outer skin. Pick the beans, let them dry out in a sunny dry place for a week or two. Then pop out the seeds and store them in a jar or envelope for next year.
There is still time to grow all your own veges this summer. The self watering process in the GreenSmart pots will enable you to plant now, go away for holidays and your plants will keep growing.
It is good to grow with GrowGood
Happy gardening,
Bill.
The post Growing beans growing tips appeared first on GrowGoodNZ.
]]>The post Basil – tips for no Fawlty Basil growing GreenSmart Pots appeared first on GrowGoodNZ.
]]>Basil is my favourite herb. The shiny leaves look great, it has a wonderful aroma and is perfect for pasta, pizza and pesto. It can be grown from seeds or seedlings and is very easy to grow in GreenSmart pots. Here are the four keys to growing great basil: plenty of warmth, consistent water, lots of nutrients in the soil and keep trimming back the leaves as the plants get bigger.
home grown basil as a gift
Conditions and Growing
Remember that basil is an annual – it needs to be replanted every year. The ideal times for growing in NZ are the October to February months as the best soil temperatures for basil are 18-35 deg. C. The plants won’t stand frost so take care with early plantings. Alternatively start your basil off inside and then shift the pot outdoors when the weather is settled.
If growing from seed, cover the seeds with a very fine seed-raising mix to roughly three times the diameter of seeds. Use the elastic-edged pot cover to prevent the top layer of soil drying out and the seedlings will emerge in about 7 days. Thin out the weaker seedlings. If starting with plants, then take care to not damage the roots during transplanting as they are very sensitive to damage. If you buy a punnet of seedlings with the roots intertwined, don’t try and separate the roots.
They like six to eight hours of sunshine per day but are also OK with dappled sunlight in summer. As they like well drained soil but don’t like going without water they are a perfect choice for growing in self watering GreenSmart Pots.
The plants will grow to be 30-50 cm high but They will quickly go to seed if stressed by lack of water.
If you shift the pot into a warm position in the house in late autumn then the plants will keep producing through the winter.
Harvesting
Nip off fresh leaves from the growing tips of the plant as this will help it to become bushy. Be sure to pinch out the flower heads to encourage the plant to produce more leaves. They are a ‘pinch and come again’ crop so keep on picking leaves as they develop. The faster growing leaves have the best flavour. The plants will start to die back after setting seeds following flowering, so keep nipping back the flowering heads to prolong the growth.
Types of Basil
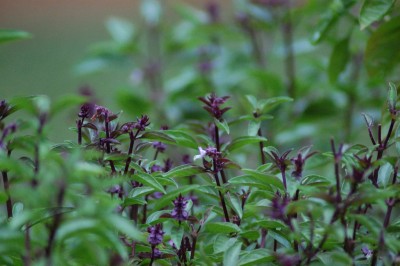
Thai basil
Check out Kings Seeds herbs/basil section for plenty of choice of different types of basil.
Fertilisers
Use a good organic fertiliser at the time of planting out and you can also add additional liquid fertiliser (eg liquid sea weed) into the water sight glass every few weeks. Yellow leaves are indicative of nutrient deficiency or cold conditions.
Pests
Avoid splashing water onto the leaves as it encourages mildew and fungal growth on the leaves.
You may find the plants become infested with whitefly or aphids so check them regularly – if the infestation isn’t too advanced you may be able to wash off the pests. Some gardeners recommend spraying with a mixture of dish washing liquid and water.
Companion Plants
Basil grows well at the base of tomato plants.
Basil as Micro-greens
You can also grow basil as a great micro-green crop. Here is an earlier article about how to grow micro-greens.
http://growgoodnz.co.nz/growing-tips/microgreens/
Happy gardening – it’s good to grow,
Bill.
The post Basil – tips for no Fawlty Basil growing GreenSmart Pots appeared first on GrowGoodNZ.
]]>The post microgreens – small plants, appeared first on GrowGoodNZ.
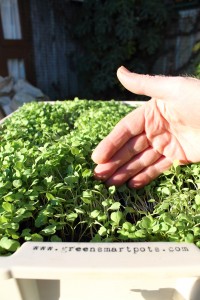
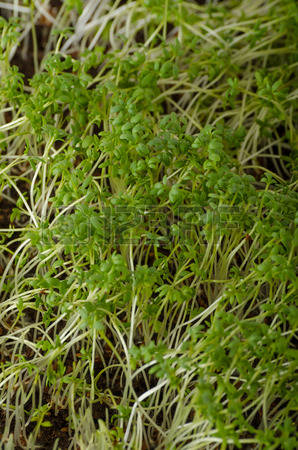
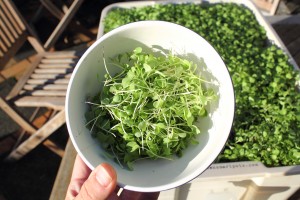
]]>Microgreens are simply are salad greens, herbs, leafy plants that are harvested when the seedlings are 3-5 cm high. I think of them as being intensively flavoured grown up sprouts with high density enzymes, minerals, chlorophyll, vitamins and minerals. They are simple to grow, fast growing, taste fantastic and look great on the plate and this makes them a perfect small space crop that can be grown all year round. These plants are so fast and easy to grow in GreenSmart pots. In addition, they can be grown right through winter and new gardeners get a super fast foolproof result !!
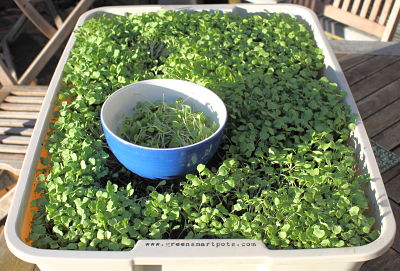

Here’s a great idea…grow your microgreens in a GreenSmart pot at your workplace. You will have fresh greens available for lunch everyday !!
Microgreens Growing Conditions
They can be grown either indoors or outdoors and can be grown all year round. In cooler parts of New Zealand you will need to have the pot under cover or indoors. Anywhere that will give the plants at least four hours sunlight per day but not direct sunlight so ideally, somewhere close to your kitchen. Ideally, where you will see them every day as they are a fast growing crop. Simply load up your pot with potting mix and sprinkle half cm layer of seed raising mix on the surface (to the depth of half your first finger joint). Spread the seeds over the seed raising mix – say 0.3 to 0.5 cm apart. Then lightly sprinkle more seed raising mix over the seeds.
Getting Started
 It is better to use seed raising mix as the top layer because potting mix is too coarse so lightly tap down the mix.Then use a mist spray to moisten the surface and cover over the pot with the elasticised edge stretch cover, add a few litres of water into the water reservoir and wait a several days for the seedlings to emerge. Remove the cover when the seedlings are 2-3 cm high. Good drainage is essential for growing microgreens so the GreenSmart self watering wicking method is a simple way to ensure that the soil does not get waterlogged and mud does not get splashed onto the microgreens. If you sow microgreens progressively every ten days you will have a continuous supply.
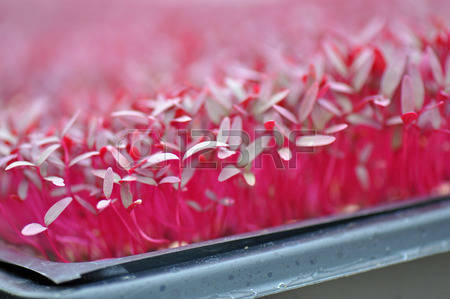
Kings Seeds have got plenty of choices of seeds. Eg beet, beetroot, radish, cress, mesclun, rocket, coriander and celery.http://www.kingsseeds.co.nz/
The rainbow beet selection will give you a beautiful mix of microgreens with red, gold, orange and white stalks.
You can check out your local organics and bulk food stores as some of them have bulk seeds.
Fertiliser
There is no need to add additional fertiliser into the potting mix but you can add a little liquid fertiliser into the water reservoir.
Pests and Diseases
Microgreens are quick growing and harvested when only one to two weeks old so they are generally not bothered by pests.
Harvesting
In winter, microgreens will be ready after about two weeks but in summer you will be able to start eating 7-10 days after sowing. Use kitchen scissors to snip off the stems just above ground level when the plants have two true leaves but not the first leaves that first emerge above ground. These plants won’t regenerate so leave the roots in the soil. Then scatter more microgreens seeds in the empty space for continuity of harvesting. The roots will break down and provide more organic matter for the soil. Try letting some of the plants develop a couple more leaves and snip them off between the first and second set of leaves. You will get a second crop from the same plants.
If the plants start to get too big you can snip them all off and store them in the fridge in a zip-lock bag for up to a week.
In the Kitchen
There are lots of different ways to use these greens so try them in salads, on pizza, in omelettes, on sandwiches or in smoothies.
Happy gardening, grow good
Bill.
The post microgreens – small plants, appeared first on GrowGoodNZ.
]]>