What are Microgreens?
Microgreens are simply are salad greens, herbs, leafy plants that are harvested when the seedlings are 3-5 cm high. I think of them as being intensively flavoured grown up sprouts with high density enzymes, minerals, chlorophyll, vitamins and minerals. They are simple to grow, fast growing, taste fantastic and look great on the plate and this makes them a perfect small space crop that can be grown all year round. These plants are so fast and easy to grow in GreenSmart pots. In addition, they can be grown right through winter and new gardeners get a super fast foolproof result !!
-
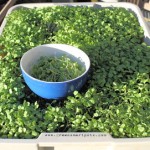
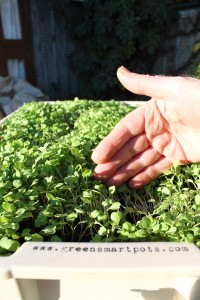
- Microgreens growing in GreenSmart pot ready for lunch.
-

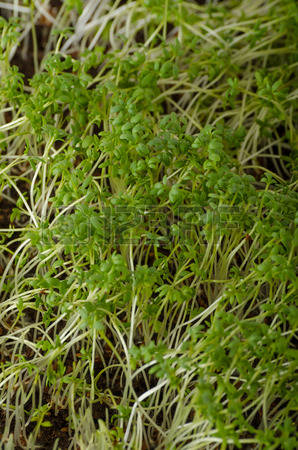
- Microgreens

-

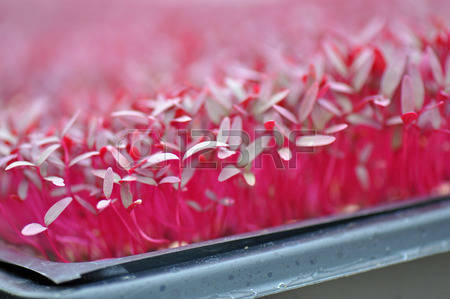
- BeautcolourMicrogreens !
-

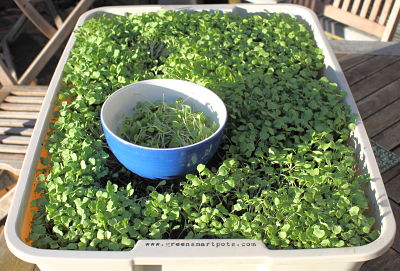
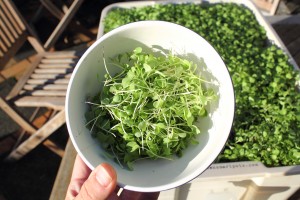
- Watercress microgreens ready for lunch
Here’s a great idea…grow your microgreens in a GreenSmart pot at your workplace. You will have fresh greens available for lunch everyday !!
Microgreens Growing Conditions
They can be grown either indoors or outdoors and can be grown all year round. In cooler parts of New Zealand you will need to have the pot under cover or indoors. Anywhere that will give the plants at least four hours sunlight per day but not direct sunlight so ideally, somewhere close to your kitchen. Ideally, where you will see them every day as they are a fast growing crop. Simply load up your pot with potting mix and sprinkle half cm layer of seed raising mix on the surface (to the depth of half your first finger joint). Spread the seeds over the seed raising mix – say 0.3 to 0.5 cm apart. Then lightly sprinkle more seed raising mix over the seeds.
Getting Started
 It is better to use seed raising mix as the top layer because potting mix is too coarse so lightly tap down the mix.Then use a mist spray to moisten the surface and cover over the pot with the elasticised edge stretch cover, add a few litres of water into the water reservoir and wait a several days for the seedlings to emerge. Remove the cover when the seedlings are 2-3 cm high. Good drainage is essential for growing microgreens so the GreenSmart self watering wicking method is a simple way to ensure that the soil does not get waterlogged and mud does not get splashed onto the microgreens. If you sow microgreens progressively every ten days you will have a continuous supply.
Kings Seeds have got plenty of choices of seeds. Eg beet, beetroot, radish, cress, mesclun, rocket, coriander and celery.http://www.kingsseeds.co.nz/
The rainbow beet selection will give you a beautiful mix of microgreens with red, gold, orange and white stalks.
You can check out your local organics and bulk food stores as some of them have bulk seeds.
Fertiliser
There is no need to add additional fertiliser into the potting mix but you can add a little liquid fertiliser into the water reservoir.
Pests and Diseases
Microgreens are quick growing and harvested when only one to two weeks old so they are generally not bothered by pests.
Harvesting
In winter, microgreens will be ready after about two weeks but in summer you will be able to start eating 7-10 days after sowing. Use kitchen scissors to snip off the stems just above ground level when the plants have two true leaves but not the first leaves that first emerge above ground. These plants won’t regenerate so leave the roots in the soil. Then scatter more microgreens seeds in the empty space for continuity of harvesting. The roots will break down and provide more organic matter for the soil. Try letting some of the plants develop a couple more leaves and snip them off between the first and second set of leaves. You will get a second crop from the same plants.
If the plants start to get too big you can snip them all off and store them in the fridge in a zip-lock bag for up to a week.
In the Kitchen
There are lots of different ways to use these greens so try them in salads, on pizza, in omelettes, on sandwiches or in smoothies.
Happy gardening, grow good
Bill.
There are no comments