Growing Kumara – Sweet As
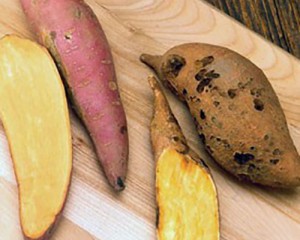
How lucky we are in New Zealand to have this nutrient-dense super-food as our national vegetable. Here are some growing tips for growing kumara in GreenSmart self-watering planters. In most parts of the world they are called sweet potatoes, however they are not the same plant family as regular potatoes. Here are the two keys to growing kumara: warm growing conditions and a hard pan underneath the roots.
Kumara Origins
Kumara originated in Latin America but it seems that they were introduced into Polynesia by Polynesian voyagers, then later brought to Aotearoa by the first Maori settlers more than a thousand years ago. These smaller varieties were later displaced by larger varieties introduced by whaling ships bringing them from Peru and then quickly adopted by both Maori and Pakeha in the 19th century for growing kumara of a better size.
Today, sweet potatoes are grown and eaten all around the world. China is the biggest consumer, chomping through a massive 77 million tonnes per year. When we lived in Shanghai I used to love buying hot dry roasted sweet potato on the street corners in winter.
Growing Conditions for Kumara.
They are tender plants with a sub-tropical preference and like shallow rich well drained soil above a hard base which prevents the tubers running deep and skinny.
Growing Kumara Slips
Start in September by selecting a large kumara (with no blemishes). Use a container or bucket with drainage holes, half fill with sand, lay the kumara sideways, cover with sand and moisten the sand and place in a warm spot like a sunny window sill. When the growing shoots (tupu) are 10-15 cm in length, gently twist the slips/tupu from the kumara and continue growing the strongest ones in a jar of water until roots are well developed. It will take about 4-6 weeks to get to the planting stage. Warmth is critical so this year I will be again growing kumara in our hothouse in Wellington.
Planting Slips
Alternatively, you can buy the growing slips from your garden centre.
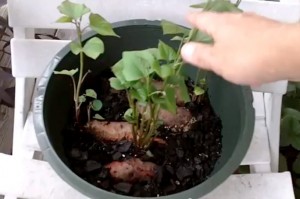
Plant 2-3 slips in each GreenSmart pot. Lay the slips on the surface and then cover with potting mix so that just a few leaves are above ground level. This will encourage more roots which will then develop into the kumara tubers.
The ideal soil temperatures are 17-35 degrees C. Kumara vines are vigorous growers and it is worth raising the GreenSmart pots well above the ground so the vines can hang down or you can leave the GreenSmart pot on the ground and allow the vines to grow up a trellis or vertical twine. Kumara grow best with three months of warmth, however the hotter the better so I find that the black or dark green pots are ideal for absorbing warmth from the sun and maintaining good soil temperatures.
Fertiliser for Growing Kumara
Add a bucket of very well matured compost plus a few handfuls of organic pellets (eg Yates Dynamic Lifter) and a handful of lime into the GreenSmart pot then fill with a bag of good quality potting mix. Add liquid fertilisers into the watering gauge when the plants are rapidly developing.
Chinese Sweet Potato Greens
Last year while holidaying in Fujian, China we tasted fantastic kumara vines cooked as a green vegetable. These young growing tips are far more tasty than spinach. This summer I am going to grow some kumara specifically for cooking the young vine tips. I will be growing kumara in a couple of GreenSmart pots with climbing frames similar to climbing beans. Then will just regularly harvest the tips.
Harvesting
After 90-110 days some of the leaves will start turning yellow. Cut off the vines at ground level and carefully take the tubers out of the pot. At this stage they have thin skin which is easily damaged. Take care to not break them. Leave for a few days in a warm spot out of the sun to allow the kumaras to ‘cure’. This is the process of converting starch into sugars.


There are no comments