Growing potatoes, chitting pretty with a spudtacular vegetable for ‘no-dig’ gardening
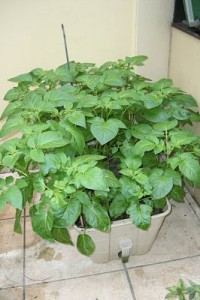
Potatoes are one of the most productive vegetables and if you don’t have much space they are easy to grow in a planter like a GreenSmartTM self-watering pot. You don’t plant seeds; you plant parts of potatoes. There is plenty of choice of spud colours – white, gold, purple and red, plus there are also some varieties that produce mini sizes. In recent years there has been an upsurge in demand for small spuds in supermarkets.
You’ll get best results using certified seed potatoes for planting because they’re free of plant diseases and viruses. However, many gardeners do use kitchen potatoes that have started to sprout.
Here are the keys to growing great potatoes: good soil fertility, consistent watering and full sun.
Chitting Pretty
Every potato has “eyes”; these can be just small depressions on the skin, or the eyes could have started to sprout white root-like extensions outwards. Chitting is simply the process of laying out potatoes in a warm dry spot; out of direct sun on newspaper or straw or in an egg carton with the eyes upwards. Cut each potato so that it has two sprouts. Allow about a month before planting out. Early chitting will give your plants a faster start after you do plant them out.
Growing Potatoes
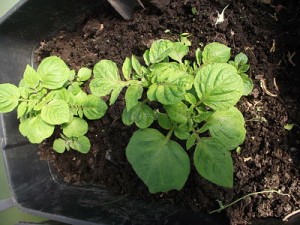
After frosts have passed, half fill a large GreenSmart pot with good quality potting mix plus well-rotted compost and animal fertiliser. Plant two seed potatoes per large pot, or one per small pot. Choose a spot that gets all day sun then place the sprouting potatoes sprout-side up on the soil and cover them. When the sprouts emerge a few cm, cover the green tops with more soil and pile up above the plants until the pot is filled with soil. The sprouts will continue growing up to the sunlight.
Mulch the top of the soil to maintain soil moisture. The mulch also prevents the developing potatoes from getting green sunburn. The green is a toxin called solanin. Now wait until the plants have matured, flowered and the leaves begin to turn yellow.
In hotter parts of NZ avoid growing potatoes in pots when the soil temperature is more than 25 degrees C as it is too warm for the roots. If you have a hothouse you will be able to start a pot of potatoes in late autumn then grow them through the winter.
Fertiliser
Well-rotted manures and compost are required. Don’t use fresh manure and avoid adding lime to the soil. You can also add liquid fertilisers (eg seaweed, compost tea) directly into the water gauge.
Watering
When the growing potatoes are rapidly developing, they will draw a surprising amount of water out of the reservoir. Refill when the water is low in the gauge. The self –watering, wicking devices will ensure that the soil remains consistently moist. It is best to avoid splashing hose water and soil onto the plants as it will only encourage diseases. Stop watering after flowering.
Harvesting
After 70-100 days the foliage will start to die back, you can start harvesting by ‘tickling’ under the plant to check the size of the crop. Each original seed potato should yield a kg of spuds.
Troubleshooting
Crop rotation – don’t re-plant the same pot or soil with another crop of spuds as fungal spores can build up.
Early blight – small spots on older leaves. It commonly occurs in warm, humid weather. Avoid wetting the foliage.
Late blight – green, brown, black patches on the leaves. It is boosted along by humid weather and is difficult to contain.
Tomato/Potato psyllid – this is a new American invader that is also called ‘zebra chip ‘ disease. If the foliage turns yellow then remove all plants immediately from your place.
What about using a stack of old tyres for growing in?
It is possible to grow spuds in a stack of old tyres, however I don’t fancy eating food that has been in contact with the chemicals and heavy metal contaminants in the tyres.


There are no comments